
There are many ways to hang up on your holidays. Holidays are always special because we get a lot of time to spend in a relaxed way. Some creative people also like to engage themselves in some activities that are completely interesting and mind blowing. Actually making your holiday a bit creative is really very different. You have spent your past holidays in a lot of different ways but this time we recommend you to be a bit creative. You are surely going to enjoy it and in addition you will get a lot of beautiful things in your home or pocket whatever may be it is. Here are some amazing projects that can make your holiday too special this time. So without wasting any more time jump into it.
Amazing Holiday Crafts that Shine:
1. Lace Tile or Coaster:
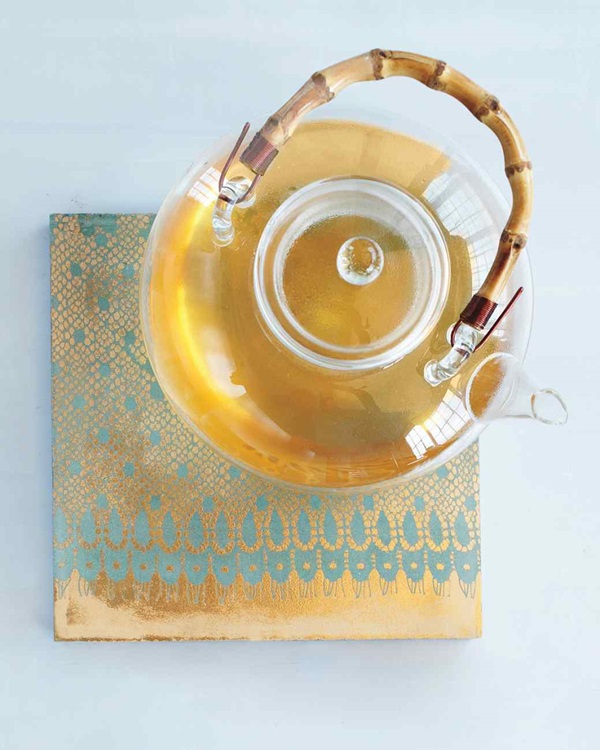
Materials: Lace Yardage (Scraps), Chantilly Lace Trims, Tiles (4 ¼ inch Square), Spray adhesive, Enamel metallic spray paint, Cork surface protectors.
Steps: Cut pieces of lace to cover the tiles and stick one side of lace with spray adhesive. Remember to make it smooth and without any wrinkles. Now spray paint with your desired color and let it dry for few minutes. Now carefully peel off the lace and place it over other tiles. You can repeat a single lace to make three to four coasters. Now attach cork surface protectors to the undersides.
2. Paillette Flower Headband:

Materials: Metal or Plastic headband whatever you prefer, length of sequin trim approximately which is about the same size of the head band, Multi use glue and paillette flower.
Steps: Cut the sequin trim to the same length as the head band. Apply glue on the headband and stick the sequin on the centre of the headband. Press it into the place nicely. Now glue the paillette flower wherever you desire.
3. Sequin Ball Earrings:

Materials: Wire cutter, Gold plated chain(5 inch long), 30 gauge gold jewelers wire, Two 4mm gold beads, Two 20mm sequin covered wooden beads, gold ball earring posts with small O-rings at their base.
Steps: Cut two 2 ½ inch lengths of gold chains and two 1 ½ inch lengths of gold wire. Now thread 1 piece of wire through 1 gold bead and thread the wire through the end of one chain. Twist the wire together to hold bead in place and trim the excess. Next works is to thread the chain through sequin wrapped bead. Cut a 1 ½ inch piece of wire, thread through the top link of the chain and through the o-ring on the bottom of the post. Now twist the wire to hold the post in place and trim the excess. Repeat the same process with the other earring.
4. 3D Glitter Stars:

Materials: Mat board, craft knife, small paintbrush, craft glue, spoon, silver glitter, thick needle, metallic cord, wire and Star ornament template.
Steps: Print template for the size of star that you need and cut out. For a single star you have to trace the template twice on the mat board and then cut out with a craft knife. Fit the four pieces together. Brush the assembled star with glue and spoon glitter over it. When it dries up completely for the ornament stars, use the needle to poke a hole through the top point and add a hanging loop of metallic cord. For a tree topper poke two holes on the arms of the star and thread wire through them to attach to the top of the tree.
5. Business Card Cases:
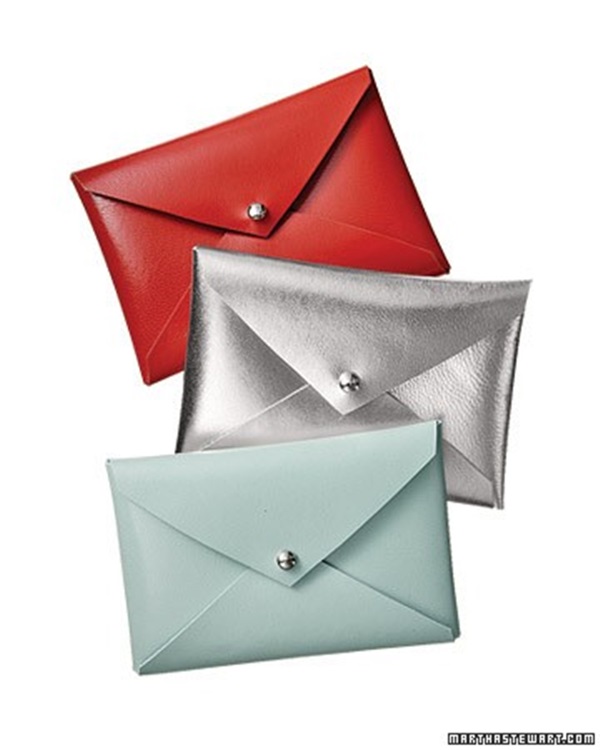
Materials: Button Stud, Card Case template, Mini hole-punch, Piece of Leather.
Steps: Print out the template as it is already sized to fit business cards. Cut out the pattern and trace it on the leather. Make small holes on the three sides as shown in the picture with a puncher or something else. The top hole is actually a bit bigger because the button stud front is to be placed there. Now fold the leather into envelope shape. Bring the left and right flap inwards and line up the hole. Hold them together with the button stud. Now insert the back piece of the button stud through the holes in the flap. Finally screw it up with the front piece of the button stud and push it through the hole on the top flap.