For the people those who are highly interested in art and craft, wood burning are a great interesting subject. This is not a very popular trend and needs a lot to be popularized, but there is no confusion that it is one of the beautiful styles of creating artistic works. You can create a wide variety of products and designs through this process of wood burning. After all wood works are itself very beautiful and amazing. But in spite of all these things, there are lots of queries among the artists about the techniques used for burning wood and that’s the cause they look for various tutorials over the internet. Here e came up with some tips that are very useful for wood burning artworks.
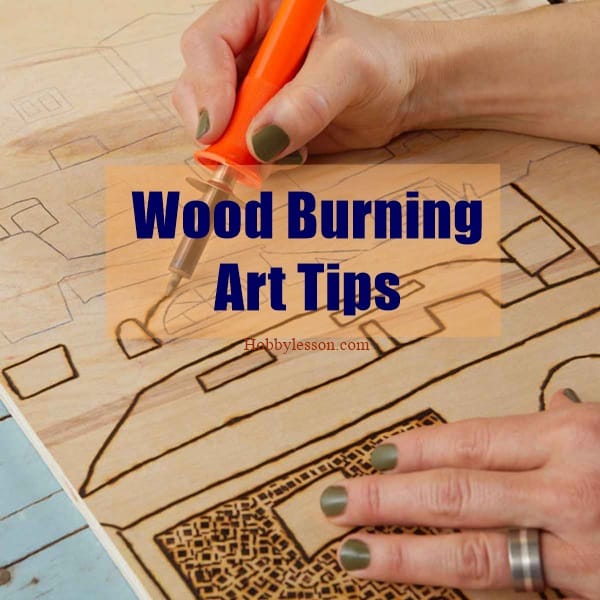
First of all you should be familiar with the tools used in wood burning. Actually the first and foremost thing that you will need is a wood burning pen. It is very easy getting it from the market and there are wide range of brands and products which varies in cost. And next you have to heat it up to burn the wood and create beautiful designs.
Now the second part which is very important is using the type of wood. You can use any type of wood according to your wish, but you should be very creative about the shapes and sizes. You can prefer any variation and pick-up any piece lying unused here and there around your house. But the main fact is that the wood should be soft enough to have a smoother experience. Hard woods are very challenging to work with while soft wood makes the work smoother and fluent. You can experiment a lot with design when using soft woods. If you are using old woods and it has been lying for many years, try to rub the wood with sand paper to make it shining.

Wood burning doesn’t have any shortcut procedures by which you can learn it quickly and fast. It takes a lot of time. Actually practice and patience are two most important things of art. It will take a lot of time to get used to this whole process and increase the fluency and expression of your work. So bring the tools and start practicing from today after some very hard practice, gradually you will start getting familiar with wood burning. Once you get familiar to it you will get a wide chance to get creative with it.
Here are some basic Wood Burning Art Tips
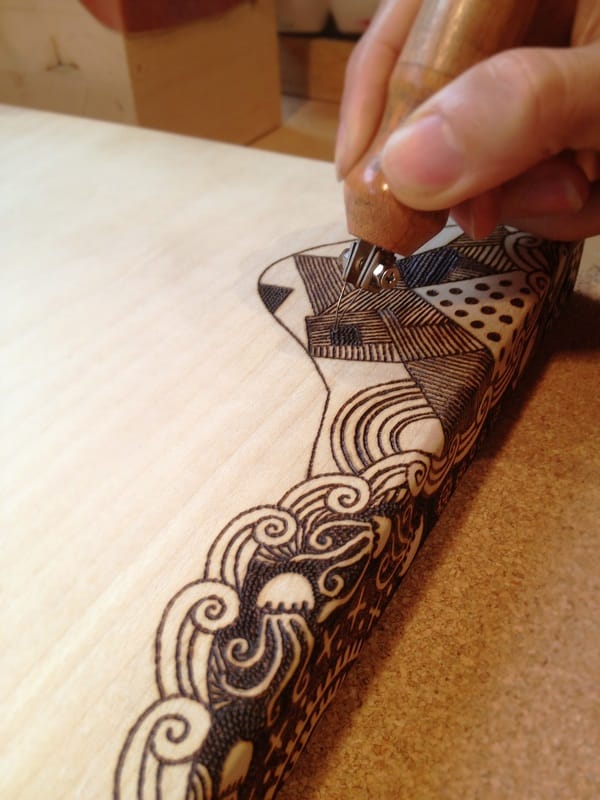
Lines: Lines are the first thing that you should learn. Drawing lines with your wood burning pen may be challenging at first but afterwards it will be normal. You can also use some straight tools to draw lines. At first don’t go to complex designs, rather start with very simple and straight designs and slowly step towards difficulties.
Dots: Using dots in the design is a very good idea. It looks very nice and also fills the space inside. Drawing dots are very easy as it don’t needs a lot of skill. You will just have to put some pressure at a point with the pen.
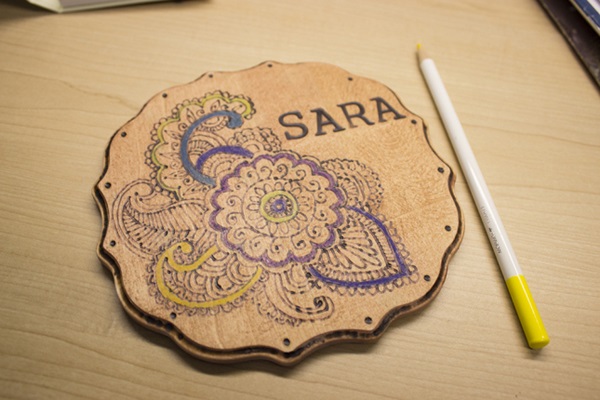
Curved Lines: You already read it earlier that curved lines and circles are a bit challenging. Actually it needs a lot of balance in your hand. This balance comes after a lot of practice and experience. But there is nothing to lose hope, go on trying one day you will surely be doing that. Once you can fluently draw circles and curved lines you can do almost anything in wood burning. You can easily solve out tough design patterns.
Shading: If you want to use shades around your designs, the better way is to use the side of your burning tool. Shading looks nice and adds a contrast in your whole works. But at first be very careful while doing shades, as it may ruin your full design.

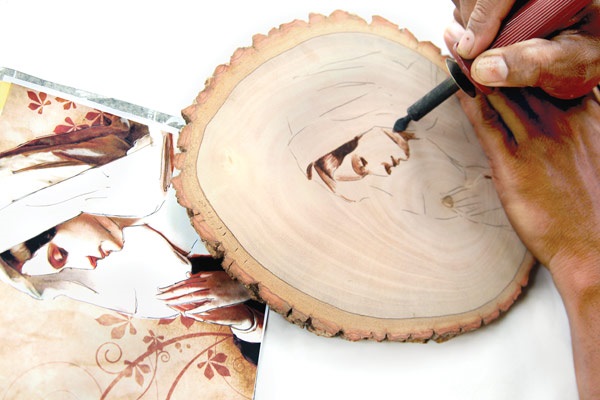
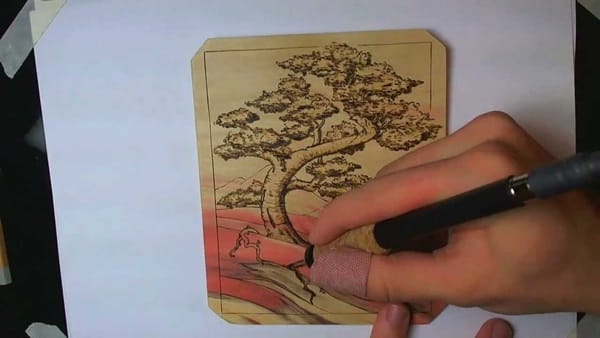
This is all about wood burning. But the last thing that you should know is making the designs free hand is a good idea but that needs a lot of artistic skills and balance. So it’s much better idea to draw the whole design with pencil at first on top of the wood, and then follow the design when burning. This is the best way for the beginners. So now you are a step higher towards wood burning after reading this tutorial.