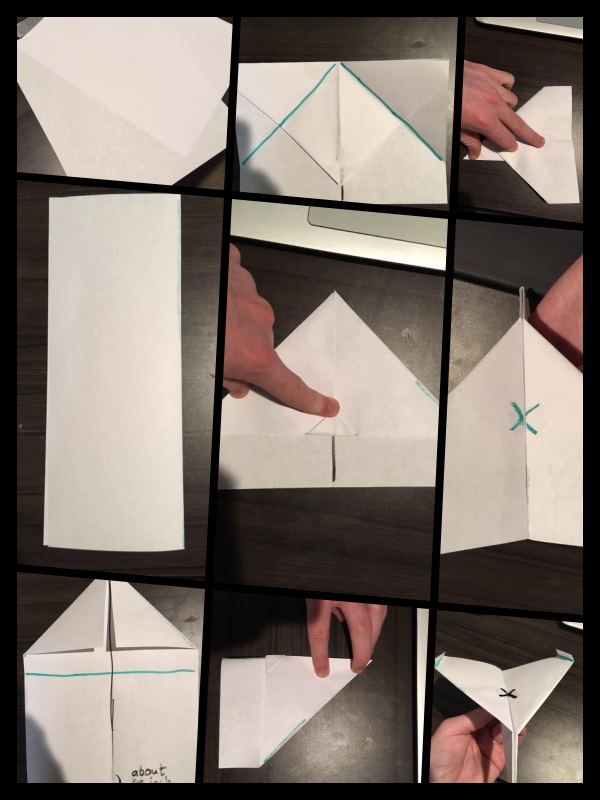
Here are many skills fathers should pass on to their children: how to ride a bike, how to skip a stone, and of course, how to make a paper airplane. When it’s time to show your kids how to fold a humble piece of paper into a soaring jet, don’t stumble around and hastily construct one from the poor memory of your youth — one that takes a disappointing nosedive as soon as it leaves your fingertips. Instead, teach them the art of making a plane that can truly go the distance. The different ways to make different shapes of paper airplane below are tried and true (you wouldn’t believe some of the science behind paper airplanes) and are perfect beginner, moderate, and expert level models to play with.
The Dart
It is a simple standard technique that everyone should know how to make.
Instructions:
- Fold the paper in half vertically.
- Unfold the paper and fold each of the top corners into the center line.
- Fold the top edges into the center line.
- Fold the plane in half toward you.
- Fold the wings down, matching the top edges up with the bottom edge of the body.
- Add double stick tape to the inside of the body.
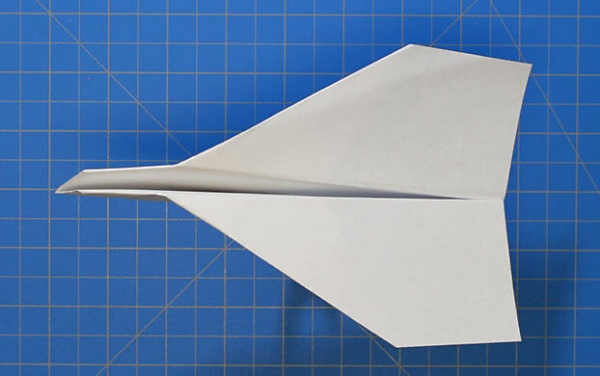
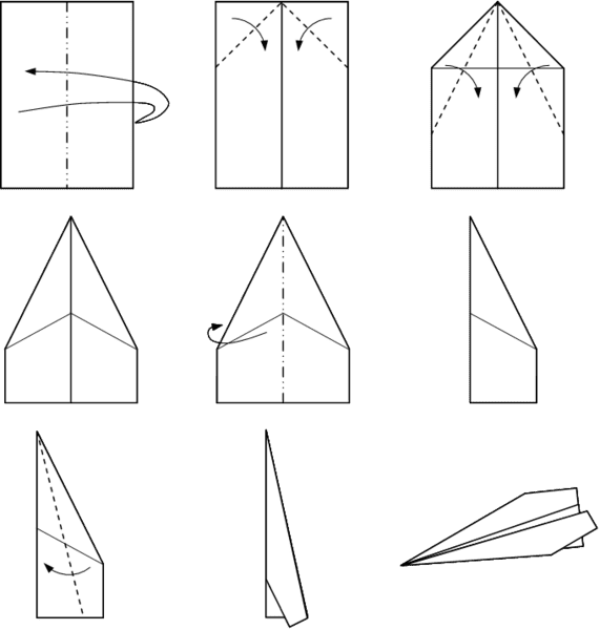
The Stealth
This one is built for distance, plus it just looks cool.
Instructions:
- Fold the paper in half vertically.
- Unfold the paper and fold each of the top corners into the center line.
- Fold the peak toward you and 3/4” from the bottom of the paper.
- Fold both top corners into the center line.
- Fold the remaining tip over the two flaps at the center line to lock them in place.
- Fold the plane in half away from you.
- Fold the wings down 1” from the bottom of the plane.
- Fold up the sides of each wing 1/2” tall.
- Cut two small slits at the back of each wing. Fold up the tabs.
- Add double stick tape to the inside of the body. The finished plane should look like this.
The Bumble
Built correctly, this bee-like beauty stays in the air for a long time.
Instructions:
- Fold the paper in half horizontally.
- Unfold the paper and fold each of the top corners into the center line.
- Fold the peak down to meet the edge of the previous fold.
- Fold the upper sides into the center line.
- Fold the top edge 1/2” away from you.
- Fold the plane in half towards you.
- Fold the wings down 1/2” from the bottom of the plane.
- Add double stick tape to the inside of the body.
The Hunter
Count on speed and distance from this sleek plane.
Instructions:
- Fold the paper in half vertically.
- Unfold the paper and fold the top edge down 2”.
- Fold the top edge down again to meet the bottom of the previous fold.
- Fold the top edge down one more time to meet the bottom of the previous fold.
- Fold the top edges down and away from you to the center line on the back of the paper.
- Fold the plane in half towards you.
- Starting at the top of the thick nose of the plane, fold the wings down 1/2” in the front and slightly angled to 1 1/2” in the back. Fold up the edges of the wings 1/2”.
- Add double stick tape to the inside of the body.
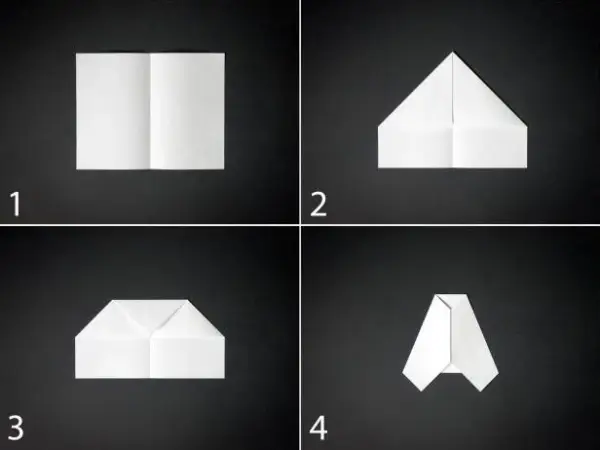
The Stable

This A4 paper plane is also easy to fold but requires more steps.
Instructions:
- Fold A4 paper in half
- Open the paper again and fold the top edges
- Fold the top to make a square (looks like an envelope)
- Fold the top 2 corners about 2cm (2 triangles from each sides can be shown)
- Secure the tips of the triangle with downward peak
- Fold the plane in half and flatten it
- Fold the edges down to create wide wings
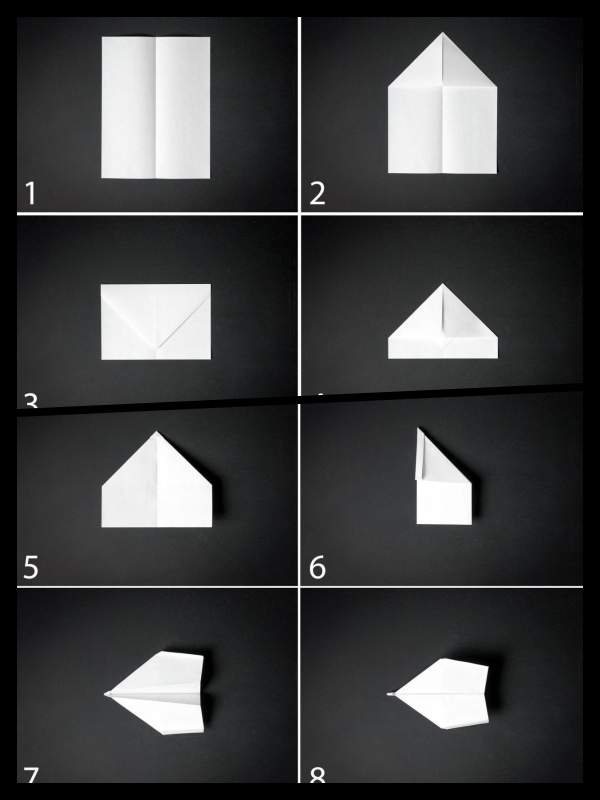
The Glider Paper Airplane
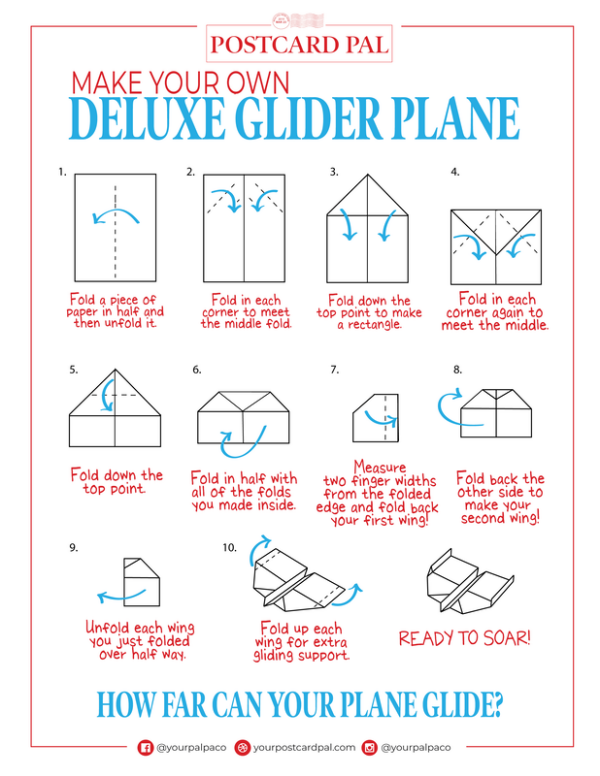
This is a fun fold that makes a glider plane with large wings that leave lots of room for decoration or modifications.
Materials Needed:
In addition to the paper and crayons listed in the beginning for this paper airplane you may also want to use optional kid’s safety scissors.
Instructions:
- Fold the top triangle you just created down to the bottom half (the fold is along the bottom straight edge of the triangle)
- Fold the upper right corner down at a diagonal to meet the center line (this will be between the top of the paper and the tip of the triangle you folded down in STEP 5), repeat on the left side
- You now have a small triangle below the two folds you did in STEP 6; fold this triangle up and crease along the bottom edge of the STEP 6 folds.
- Refold the plane in half long ways, along the center crease you created in the beginning (the folds you created in previous steps will be on the outside of this fold)
- With the paper lying with the crease facing you, fold back the top edge down to meet the middle crease, flip the paper over and repeat on the other side, creating the wings
- This glider plane is fun to throw as-is, but if your child loves scissors as much as my daughter this is a good opportunity to cut the large wings. Cut out triangles, make fringe, or whatever your kid would like.
- Lightly grip the plane by the middle of the center crease in your dominant hand. Pull your hand back to your shoulder with the airplane level with or slightly above your head, then shoot your hand forward, aiming slightly upward, while releasing the plane to make it fly.