Dolls are really very cute and so the best companion of kids. Probably you buy toys and dolls for your kids but did you ever thought of making the dolls on your own? Yes it’s an amazing experience when you will see your kids playing with your own hand made things. Really if you are looking forward to have such an experience you are at the right place. Here you will be taught making beautiful handmade dolls which is very easy to make and you will probably get a lot of interest in making it. OK now let’s move into the tutorial without spending any more time.
Cute and Easy Doll Making Craft for Kids:
Supplies you will need:
Doll Template
10/18 inch of washable fabric
10 inch square of cotton jersey
Needle
Skin colored thread
Pins
Wool or Polyester Batting
Chopstick
Yarn
Embroidery Floss
Procedure of Making:
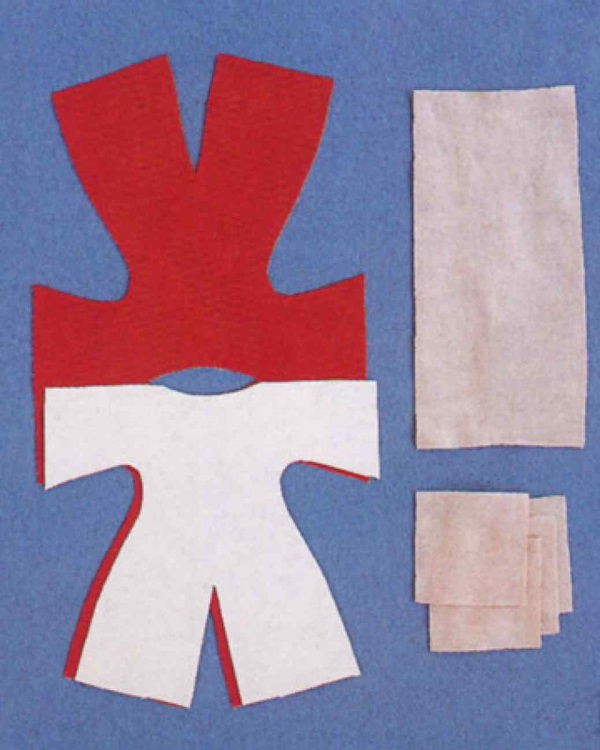
1. At first you will have to download and print the template from this given link. Then after you get the hard copy of the template, take the 10/18 inch washable fabric and fold it. Place the template on one side of the fabric and cut it nicely according to the outline of the template. Now pin the fabric. Now take the square jersey and cut a strip of 3/7 inch and four 2 inch squares from it as shown in the picture below. Pin it again.
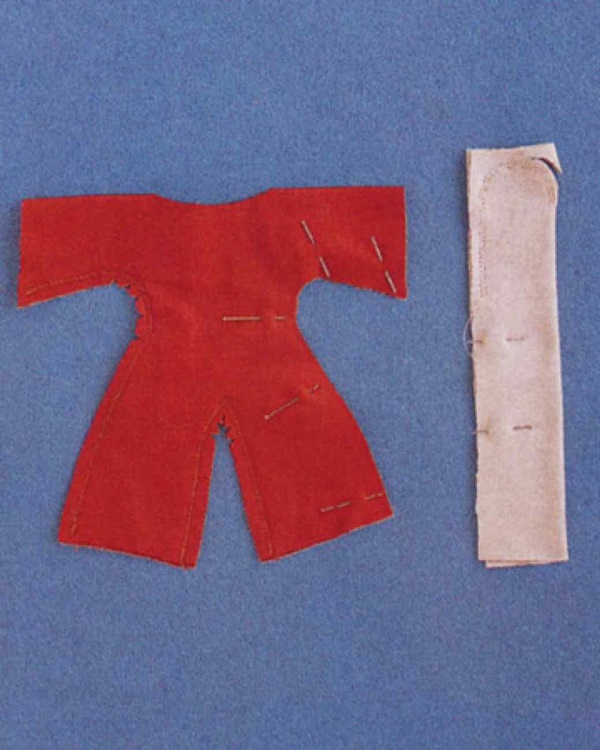
2. Now your next step is to stitch the pieces of fabric as directed. Starting at the outer edge of one leg, stitch upwards to the end the end of the arm. The seam allowance should be ¼ inch. Now repeat the same on the other side of the body. Once it is done on both the sides, stitch the inner edge of the legs. Notch the curves on the body. Fold the rectangle fabric you have cut into half and pin. Starting at the fold, stitch the curve shape across short end and continue stitching down open side. Snip away the excess fabric, keeping 1/8 inch seam allowance. Turn both the pieces right side out.
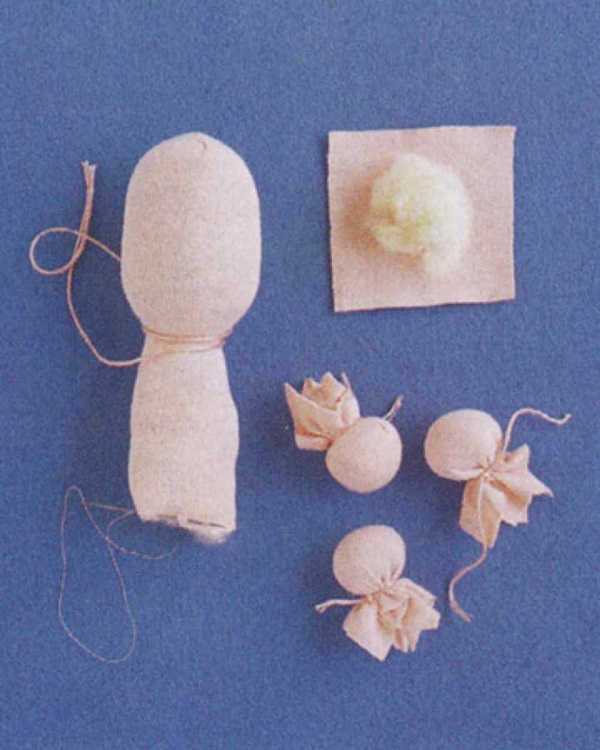
3. Cut three 2/7 inch strips of wool or polyester batting. Lay them in a start shape as you are seeing in the picture here and now take some batting and roll to make a 2 inch ball. Place it n the center of the star. Bring the strips up and around the ball use a chopstick and your fingers to push the whole batting inside head. Remember that the head should be firm. If necessary add some extra batting and smooth with fingers.

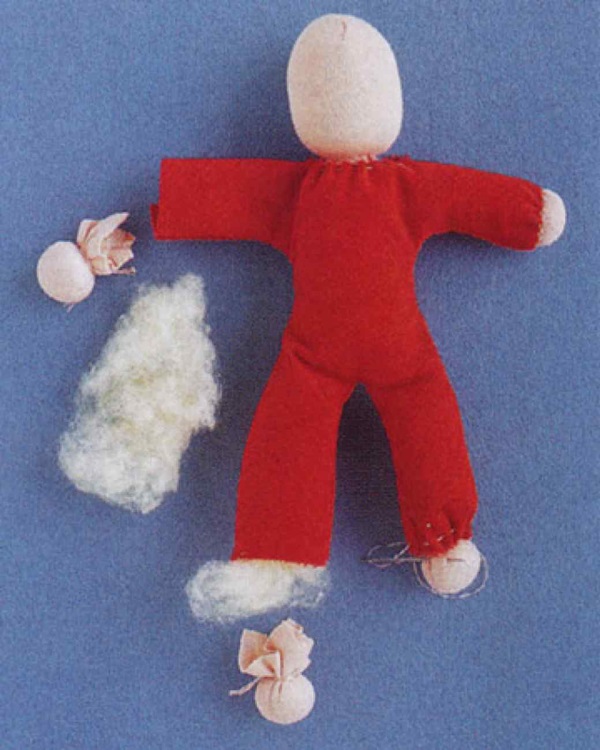
4. Now it’s your time to make head hands and feet. Tie thread of the same color as the skin to create a neck. Then stitch the bottom opening closed. For making the hands and feet, place the 1 inch ball of batting on each square tying the bottom with thread as shown in the picture.
5. You will have to stuff the whole body but not as firmly as the head. Use gathering stitch to tighten neck opening and then slick head into neck opening. With a double length of skin colored thread, whip stitch head to the body, folding under raw edge of the body. Repeat the same for hands and feet.
6. You can now use pins to mark the features you will add to the doll. Sew on yarns for hair to keep it in place. Make an extra tiny anchoring stitch at the end of every loop. For features, insert a needle threaded with embroidery floss through the back of the head and out at a pin. Stitch the features and remember that the needle should exit at the back of the head.

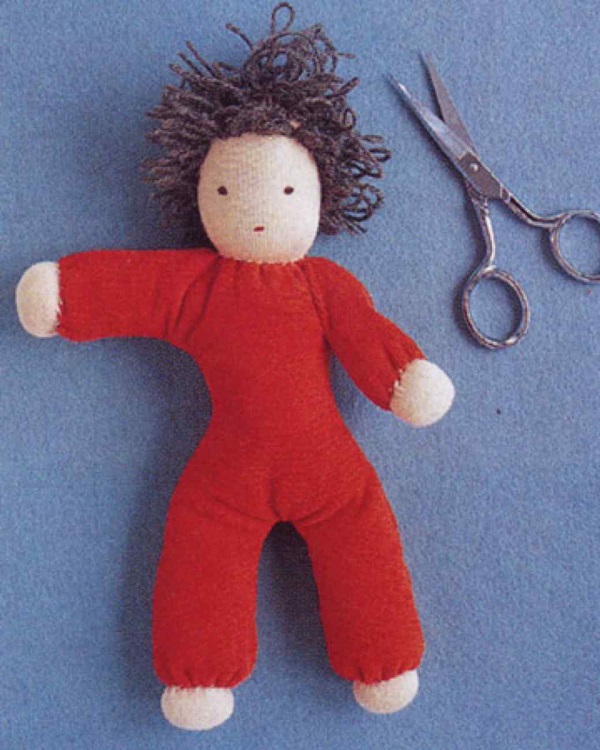
7. Snip loops of hair and fluff. Use your fingers to shape the face.
Your handmade doll is now almost ready and you can gift this to your child on any occasion. Just notice, how happy they will be after getting the doll.